


What is the Osmotic flow method of coffee brewing?
What is the Osmotic flow method of coffee brewing?
The versatility of the Hario V60 is something that has ensured its popularity amongst coffee lovers who crave experimentation as much as they enjoy a fool-proof way of making delicious coffee.
If you’re looking for varied ways to brew your favourite coffee using a V60, the Osmotic method is a great place to start. It’s satisfying, not only in that it makes a tasty brew, but the method is engaging to follow and it looks spectacular!
What does Osmotic mean?
Osmotic comes from the root word ‘osmosis’ meaning to diffuse fluid through a semi-permeable membrane – in this case a crust of ground coffee.
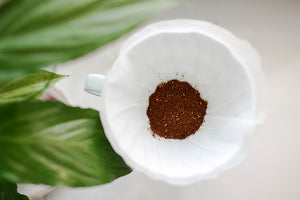
Osmotic Flow Method is a traditional Japanese way of brewing coffee, where the grounds are molded into a dome and water is poured very gently through them. The aim is to keep the coffee grounds as stable as possible.
How does it differ from standard brewing?

The main difference between standard pour-over methods and the osmotic flow method is the manner in which you pour water into the coffee bed.
Usually when using a V60 you would pour your water in circles around the coffee bed, maintaining a flat surface and even extraction across the surface of the coffee. With the osmotic method water is only pour into the centre of the coffee bed, this, combined with the CO2 release from the coffee creates a domed crust of coffee.
Underneath this the real magic is happening: As gas released from the coffee pushes upwards, the space it occupied is filled with water. A convection flow is created, meaning that coffee particles are moving under the surface of the coffee-dome. By pulsing the water flow, and keeping the dome in tact; the coffee flavours are brought out bit by bit as the water flows through them, rather than having time to steep and over-extract as can sometimes happen in a flat bed of coffee.
Osmotic Flow Method
Requirements
Hario V60 or Hario Immersion Dripper Switch
Narrow spouted kettle
Dose: 20g coffee: 250ml water
Time: Enough time for grounds to bloom up like a dome. Usually 30s for bloom, 3-4 mins total.
Procedure
Use medium-fine grounds, and the ratio tends to be quite large. The dome will stay put better if you use even more coffee beans. In the cone, place the rinsed filter and then add the coffee. Shake the dripper a little to flatten the grounds, then pour a bit of water to bloom the coffee. Let the grounds bloom up like a dome.
At the edge of the cone, leave a little bit of dry ground to prevent the dome from collapsing. The CO2 release will cause the grounds’ surface to rise in a dome-like shape. When the bloom has lasted 30 seconds, pour more water very gently at the center. There will be white fine bubbles where the water hits. The dome will expand further as a result. Be sure to stop before the dome cracks.
Add a little more after the dome has fallen back down. Keep pouring water in a pulse up to about 1/3 of the water. Once you have reached 1/3, start circling the white bubbles with your pour. The goal is to expand the white bubble region gradually. Ensure that the bubbles do not run down to the edge of the cone. You will need to repeat this until you reach your desired amount of water.
The main idea is to keep away from the edge of the dripper, and to not submerge the coffee grounds completely. Pouring into the centre, around the bubbles will generate osmotic pressure and should result in an exceptionally clean tasting coffee.